Python is not a programming language for writing algorithms. It is a dynamic language , secure and high level. If we want to write a complex algorithm we need pointers for efficiency and we will probably use C/C++. Python do have tons of external packages, some of them implemented in C and using a simple interface we can do great (and fast) processing
One popular area in algorithms is Signal processing. If you want to manipulate audio, video, images or any other signal you can use some python packages that implemented in C and you win it all – easy programming and fast execution and response.
Matplotlib and NumPy
Matplotlib package is useful for graph generation and visualisation. We can also use it to read and display images:
import numpy as np
import matplotlib.pyplot as py
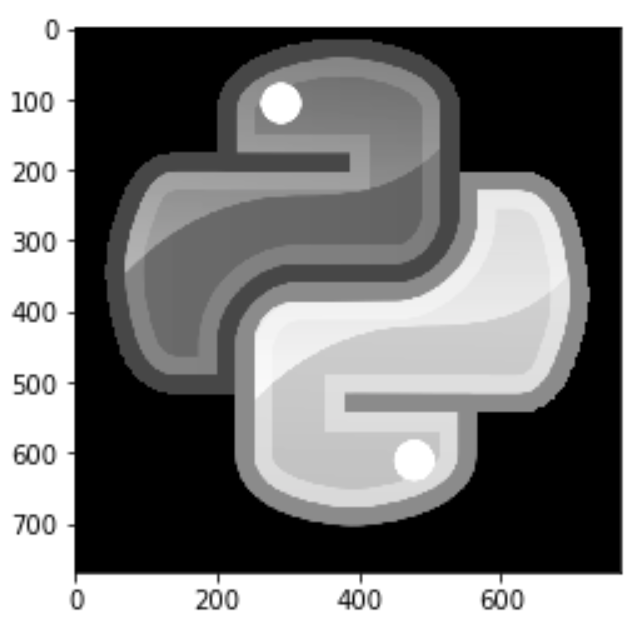
img = py.imread('/Users/liran/python.png')
py.imshow(img)
Output:

The img object is NumPy array. We can read some properties for example the image shape:
>>> img.shape
(768,768,4)
We have 3 dimension array , 768*768 pixels and 4 bytes per pixel: R, G, B, A (alpha).
Lets write a simple function rgb2gray To convert the image to grayscale
you need to calculate for each pixel:
R * 0.299 + G * 0.587 + B * 0.144
def rgb2gray(rgb):
    fil = [0.299, 0.587, 0.144, 0]
    return np.dot(rgb, fil)
We use here NumPy dot product to multiply each pixel value.
Lets display the image again, we need to specify the colormap to be grayscale
img = rgb2gray(img)
py.imshow(img,cmap='gray')
The Alpha blending value
The Alpha blending value is not required you can load a image without – means you have only 3 bytes per pixel (RGB). For example:
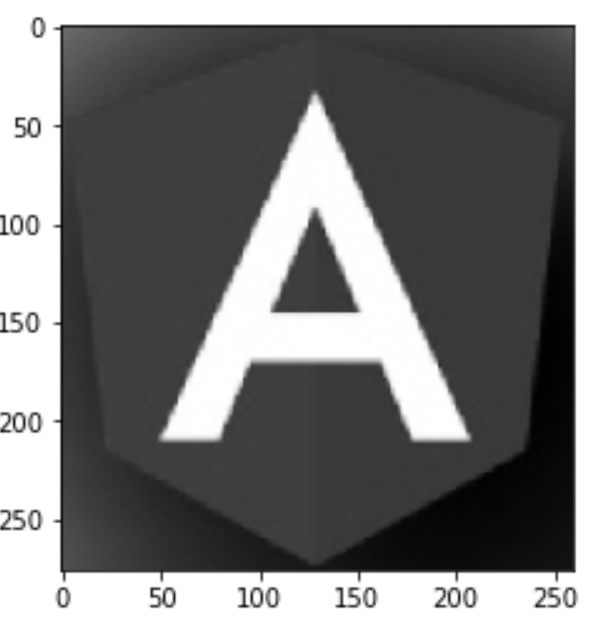
img = py.imread('/Users/liran/angular.png')
py.imshow(img)

>>> img.shape
(276,260,3)
We need to change the above function to multiple with only 3 values array:
def rgb2gray(rgb):
    fil = [0.299, 0.587, 0.144]
    return np.dot(rgb, fil)
We can make other filters using NumPy functions but we don’t need to “reinvent the wheel”
Using SciPy
Scipy packages built over numpy to extend it with scientific functions
We can use scipy.signal package to run some filters for example:
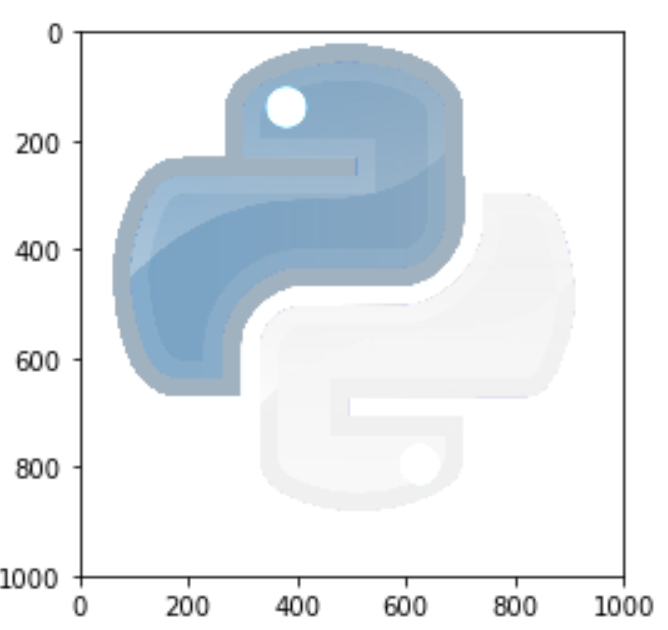
import scipy.signal as scs
img = py.imread('/Users/liran/python.png')
filtered = scs.medfilt(img)
py.imshow(filtered)
Using SciKit-Image
SciKits are many packages build above SciPy to support different scientific areas like signal processing, RF, and many more. You can see the full list here
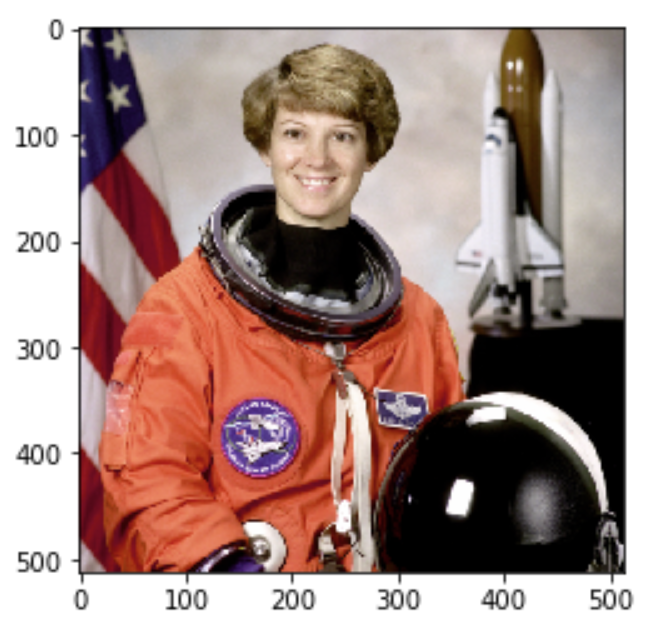
We can use scikit-image to manipulate images in a few lines of code. It also contains some sample images built in the library for example:
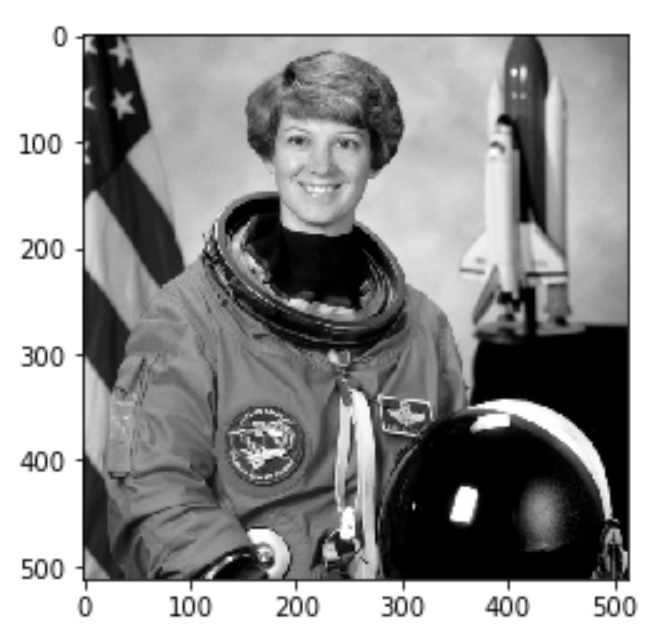
import skimage.data as skd
import scipy.misc as scm

img1=skd.astronaut()
py.imshow(img1)
Now If you want to run a filter you have many functions for example to convert the above image to grayscale :
import skimage as sk
img=skd.astronaut()
gray = sk.color.rgb2gray(img)
py.imshow(gray, cmap = 'gray')
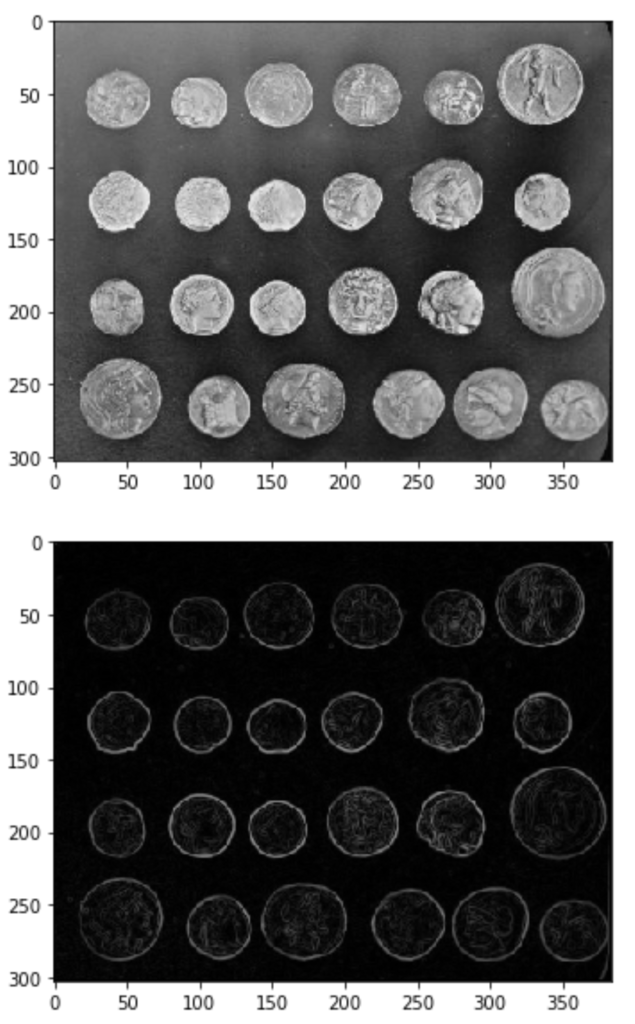
You can run other filters using the filters package for example sobel filter:
image = sk.data.coins()
sk.io.imshow(image)
sk.io.show()
edges = sk.filters.sobel(image)
sk.io.imshow(edges)
sk.io.show()
As you can see, for practical use, you don’t have to be mathematician , you can use many popular packages to get great results. most of those packages implemented in C so it works fast.
3 thoughts on “Simple Image Processing with Python”
Comments are closed.
Thanks so much for sharing such a valuable info. I really appreciate your wonderful explanation. Please keep posting such kind of information on your page. I will certainly dig it and personally suggest to my friends. I’m sure they’ll be benefited from this website.
please tell me which software i have to use for image processing using python. i am really confused about it,
PyCharm